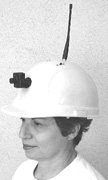
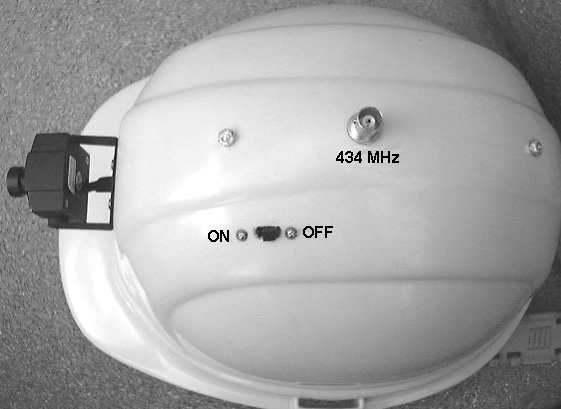
A 3/8 diameter hole is drilled in the top center for the antenna UG-1094 BNC chassis connector. Solder the coax braid directly to the top of the BNC shell. Next drill 1/8" diameter holes for the 9 Volt battery holders with one 3" to the rear of the BNC and the other 2" to the front. I used 4-40x3/8 screws with the nut and lock washer on the outside of the hard hat to mount the battery holders. 1/16" holes are drilled for the slide switch approximately 1.5" forward and to one side from the BNC.
Drilling for the mini color camera bracket is a little more involved. A hole must be drilled in both the camera bracket and hat with a .312 dia. drill so that the cable plug can be fed through from inside the hat. Drill 1/8" holes for the two camera bracket mounting holes, mount the bracket using two 4-40x3/8 screws, lock washers and nuts, then drill out the bracket and hat thus insuring good alignment of the holes. Remove the bracket. Remove the connectors on the camera cable.
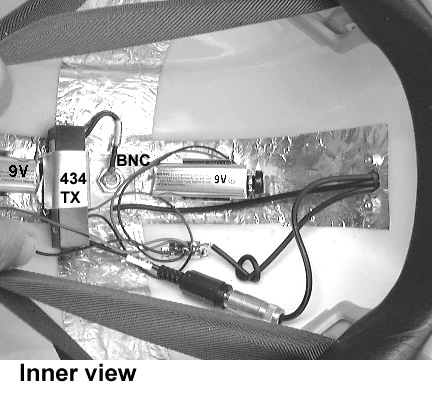
Next, cut two 1.5x13" strips of aluminum foil and glue to the hat inside and centered on the antenna jack hole. Let it completely dry then cut the holes free with an Exact-O knife.
Make a 1" wide by 3" long sheet aluminum or brass bracket for the Videolynx transmitter by first drilling a 3/8" diameter hole centered and 1/2" from one end. Make a right angle bend 1" from the drilled end. Loosely mount the bracket on the BNC jack. Then place the Videolynx against the bracket with the leads pointing toward the BNC and bend the metal tight around the transmitter module. Trim the end if necessary.
Mount the power slide switch, battery holders, and camera. Connect the camera red power cable and Videolynx power leads to each side of the dpdt slide switch on one end. Connect both (3 if using the Z70A transmitter - see MCM 29-6076) of the 9V battery clip leads to the respective center lugs - red +9 V on one side, black or ground on the other. Also see MCM 29-6077 and MCM 29-6079 9V battery holders. Rather than splice the yellow video coax I put a RCA plug on the cable and plugged into the Videolynx video jack. The line audio cable is only used with the Z70A transmitter. Use a good resonant 50 Ohm antenna plugged into the BNC jack such as the Diamond RH519. You can also take the hard hat off and plug in a small beam like the OAL 5L-70cm to more than double the distance for fixed portable applications.


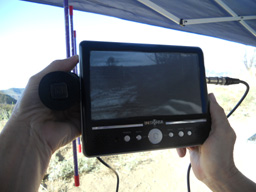
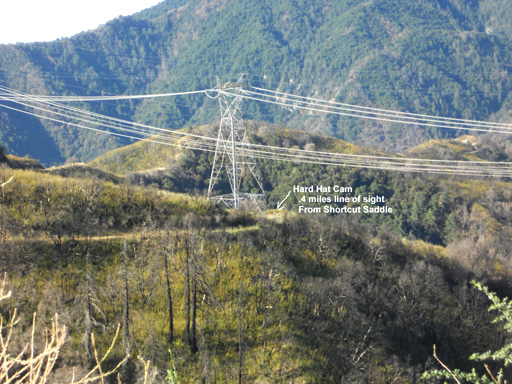 P5 video was received at the Mt. Disappointment trail 33 mile run Shortcut Saddle aid station from the hat cam 4/10 of a mile away. This section of the course is a full sun exposed tough climb out of a valley run in mid August and the video can show the condition and number of the runners well before they arrive. The 434 MHz signal was received on cable channel 59 using an Insignia 7" portable TV and small 70cm beam at the aid station.